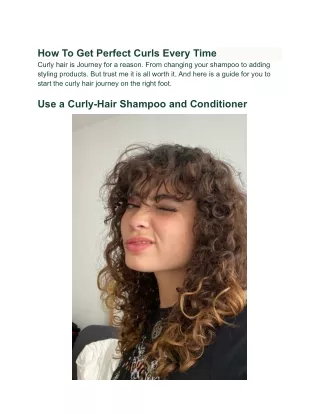
Leaked: How To Curl Hair With A Straightener For Perfect Curls Every Time
Have you ever wondered how hairstylists create those perfect, bouncy curls using just a flat iron? You're not alone! While most of us associate hair straighteners with sleek, smooth styles, these versatile tools can actually be your secret weapon for achieving gorgeous curls. In this comprehensive guide, we're revealing professional techniques that have been closely guarded by stylists—until now. Whether you're preparing for a special event or just want to switch up your everyday look, mastering the art of curling with a straightener will transform your styling routine.
Throughout history, people have experimented with countless methods to create curls—from hot rollers and fabric ribbons to round brushes and traditional curling wands. But today, we're focusing on one of the most versatile tools in your hair arsenal: the flat iron. As the name implies, flat irons (also known as hair straighteners) were originally designed to flatten out bends and curls for a smooth, flat look. However, creative stylists quickly discovered that these tools could be used in reverse to create stunning waves and curls.
Understanding the Basics of Flat Iron Curling
Before diving into specific techniques, it's essential to understand why flat irons work so well for curling. The key lies in the even heat distribution and the ability to control the direction and tension as you glide the tool through your hair. Unlike traditional curling irons that wrap hair around a barrel, flat irons allow for more precise manipulation of the hair shaft, creating everything from loose beach waves to tight, defined curls.
- The Nude Truth 180 Minutes Equals 3 Hours You Wont Believe This
- Nude Photo Explosion The Secret Evidence That Epstein Never Died
The process begins with selecting the right flat iron. While most straighteners can technically create curls, professional-grade tools with features like titanium plates (which hold heat more consistently) and adjustable temperature settings will yield the best results. The size of the iron matters too—a 1-inch plate is ideal for most hair types, offering enough surface area to work efficiently while still allowing for tight curls.
7 Professional Techniques to Curl Hair with a Flat Iron
In this post, I'll walk you through 7 of my favorite techniques to curl hair with a flat iron. These methods have been refined over years of professional experience and are suitable for all hair types. Let's start with the basic technique that forms the foundation for more advanced styles.
The fundamental method involves positioning your flat iron near your scalp, turning it halfway backward, and gliding it down the length of your hair. This simple motion creates a natural-looking curl with minimal effort. The key is maintaining consistent tension and speed as you move the iron down the hair shaft. Too slow, and you risk overheating; too fast, and you won't achieve the desired curl formation.
- Ashleys Nude Photos Leaked Does This Mean She And Danny Are Done
- Leaked Photos Expose The Nude Haircut Secret Every Woman Is Dying To Try
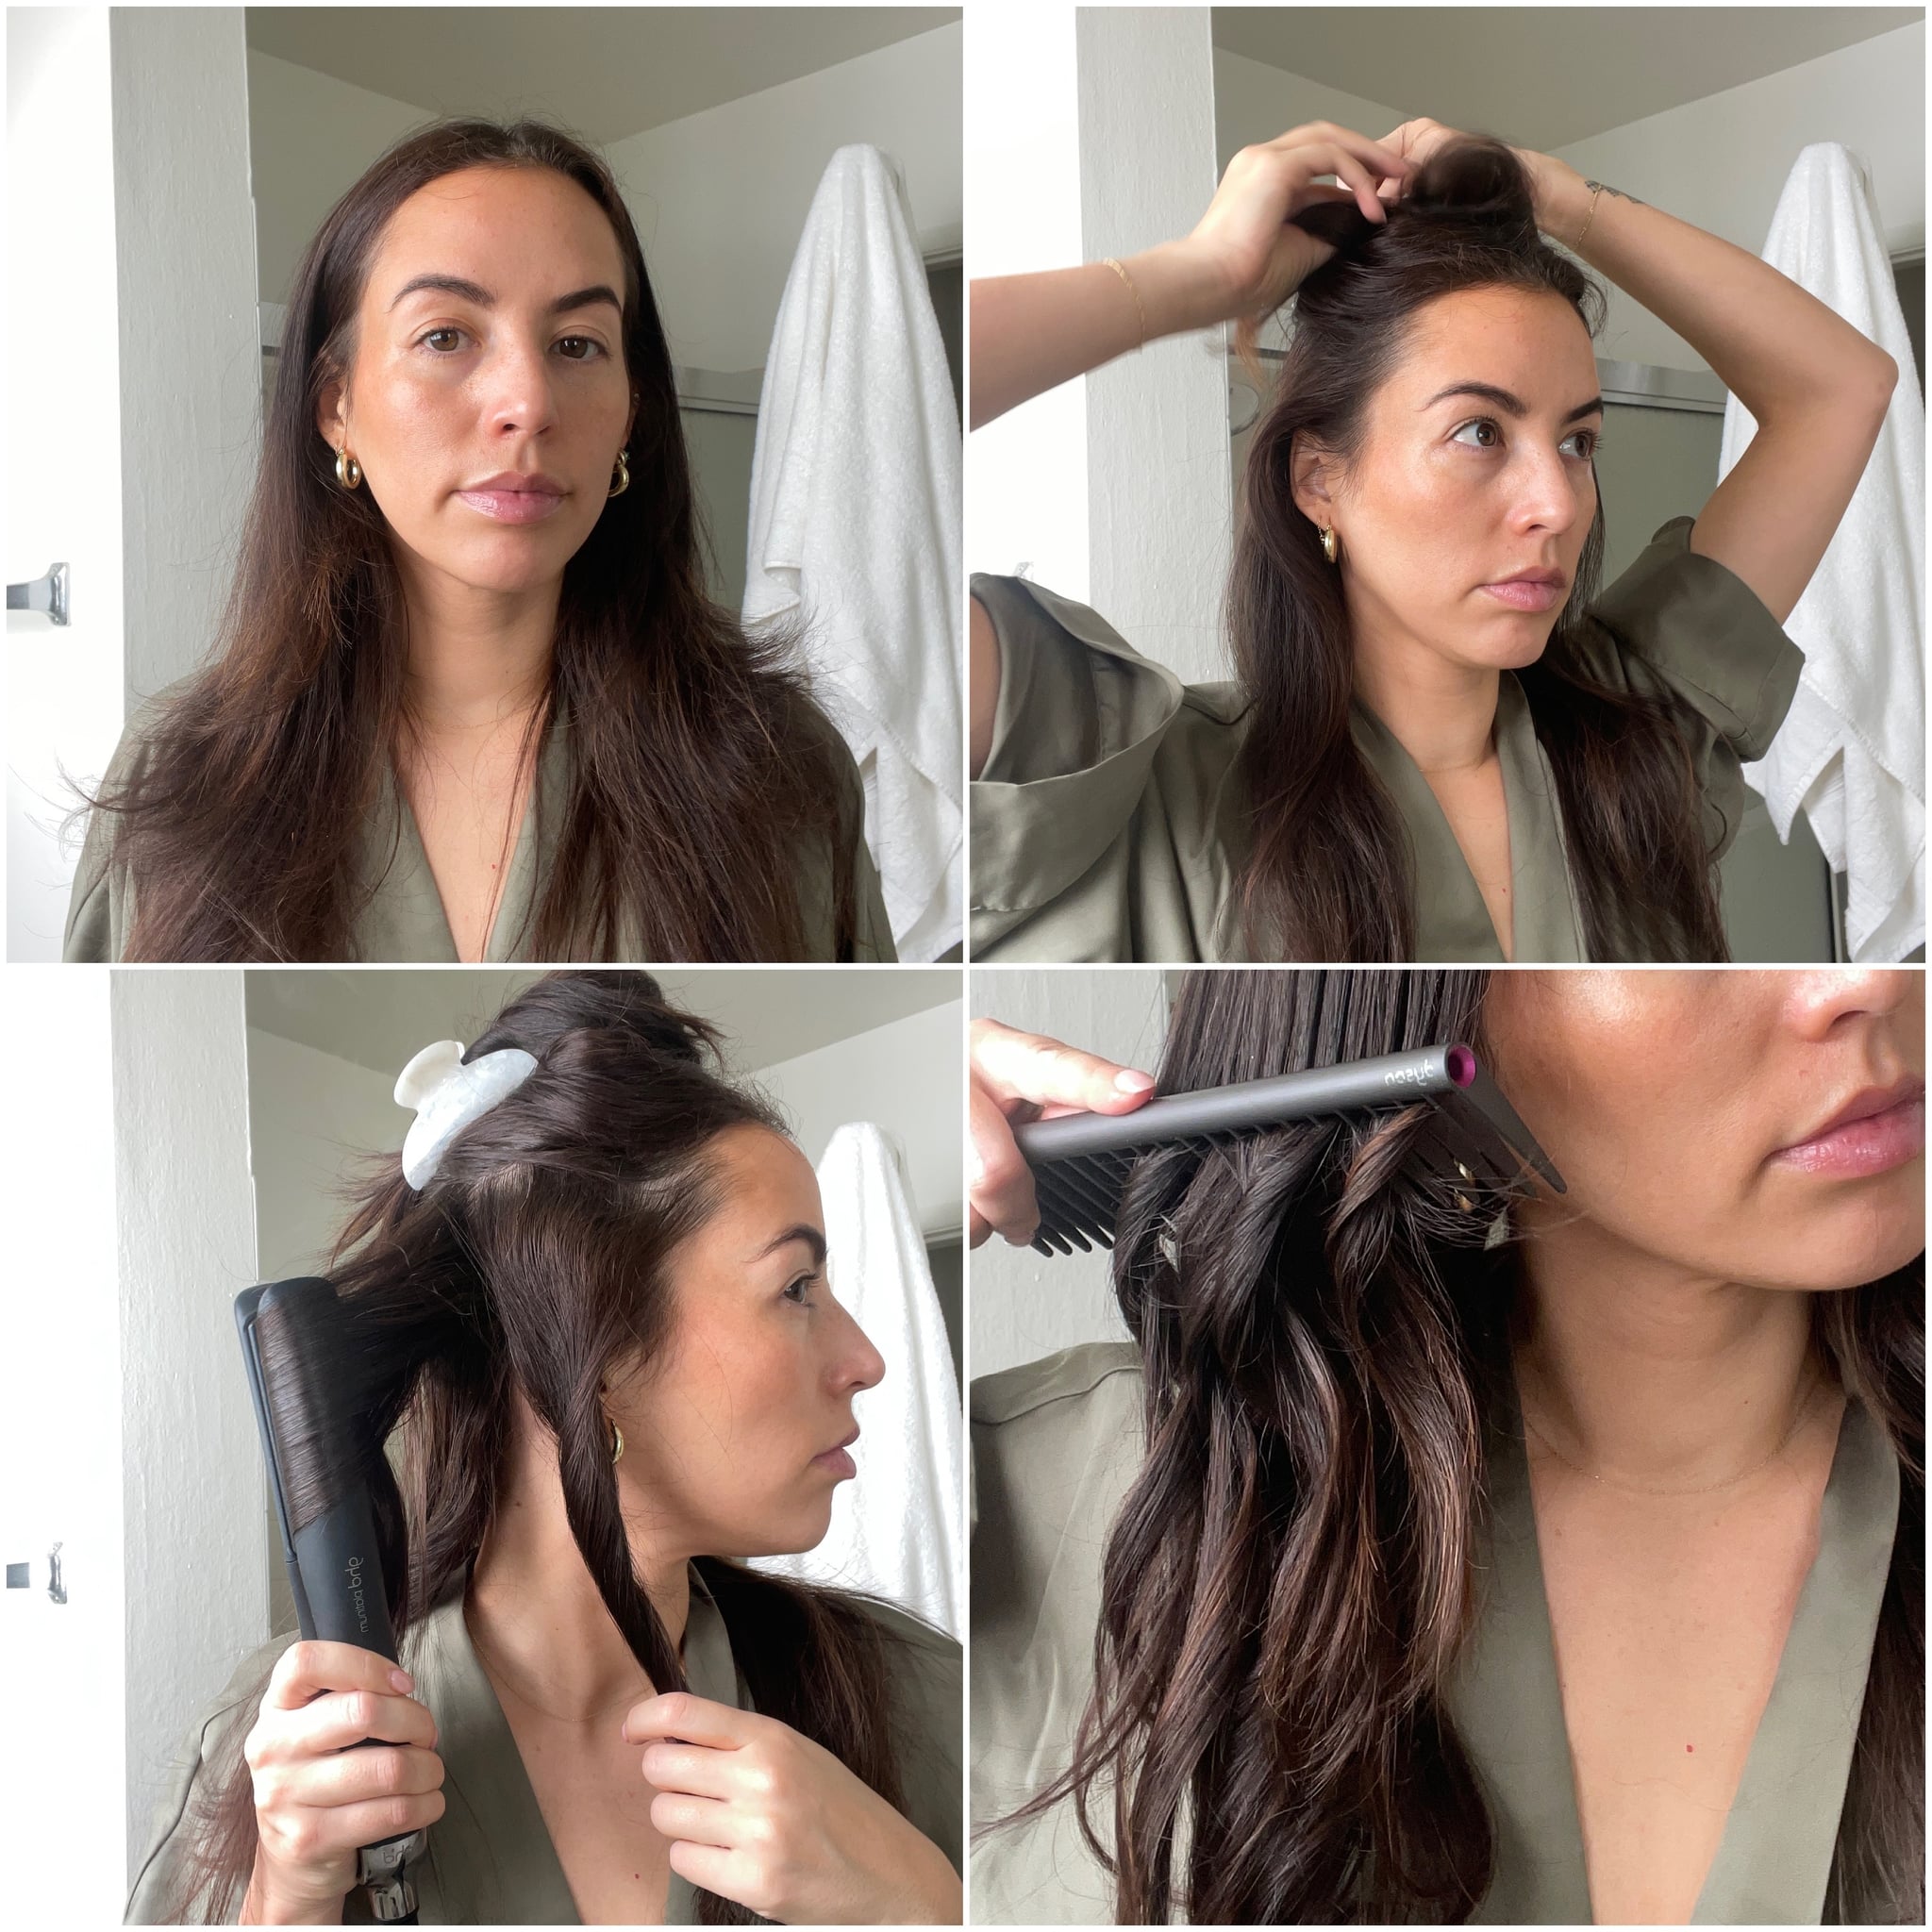
Creating Bouncy Curls: A Step-by-Step Tutorial
TikTok video from ghd Australia and New Zealand (@ghdhair_anz) demonstrates one of the most popular techniques for creating beautiful curls using a hair straightener. Their easy tutorial has gained millions of views because it's perfect for all hair types and produces consistently stunning results. The secret lies in the wrist movement and the angle at which you hold the flat iron.
To achieve bouncy curls, start by sectioning your hair into manageable portions. Take a small section (about 1-2 inches wide) and clamp the flat iron near the roots. Instead of simply gliding down, rotate the iron 180 degrees away from your face, then slowly pull it through the hair while maintaining that rotated position. This creates a spiral effect that, when repeated throughout your hair, results in voluminous, bouncy curls that last for hours.
The Perfect Curling Technique Using a Flat Iron
Watch how I get these bouncy, gorgeous curls on my client. As a stylist, it's important for me to preserve my clients' natural curl patterns while enhancing their hair's texture. I'm using only one pass with the flat iron for each section, which minimizes heat damage while still achieving beautiful results. The end results are so satisfying—would you get this style?
The technique I'm demonstrating involves a combination of rotation and gliding. Start with the flat iron at a 45-degree angle to your head, then rotate it halfway as you move down the hair shaft. The rotation creates the curl, while the consistent movement prevents heat damage. For tighter curls, rotate more dramatically; for looser waves, use a gentler rotation.
Essential Tools for Professional Results
Explore the best hair tools for drying, curling, and straightening to achieve flawless hair every day. While the flat iron is our focus, having the right supporting tools makes a significant difference. A high-quality hair dryer with a concentrator nozzle helps prepare your hair by smoothing the cuticle before curling. Sectioning clips keep your hair organized, and a heat protectant spray is non-negotiable for maintaining hair health.
I've been teaching flat iron curls for almost 10 years now, and it's still my preferred method of curling on 90% of my clients. The versatility and control it offers simply can't be matched by traditional curling irons. My really fine-haired clients, I'll grab a curling iron occasionally, but for most hair types, the flat iron delivers superior results with less damage.
Choosing the Right Flat Iron for Your Hair Type
I'm using my BabylissPro Nano Titanium Primo 3100 1-inch iron for these demonstrations. The plates are titanium, which holds heat all around better and glides through the hair like a dream. Titanium plates are particularly beneficial for coarse or thick hair because they maintain consistent high heat. For fine or damaged hair, ceramic plates might be a better choice as they distribute heat more gently.
Here's what you need to know about selecting the perfect flat iron: consider your hair type, desired curl style, and budget. Professional-grade tools typically offer better temperature control and more durable construction, but there are excellent mid-range options that work wonderfully for home use. Look for features like adjustable heat settings (ideally ranging from 250°F to 450°F), automatic shut-off for safety, and a comfortable grip for extended styling sessions.
Understanding Hair Texture and Curl Formation
In conclusion, understanding hair texture is essential for anyone looking to achieve tight curly hair or loose waves. By recognizing the unique characteristics of different hair types and the factors that contribute to curl formation, individuals can tailor their hair care routines and styling techniques to enhance their natural curls and achieve the desired look.
Hair texture plays a crucial role in how curls form and hold. Fine hair might require lower heat settings and smaller sections to prevent damage, while thick, coarse hair might need higher temperatures and larger sections to achieve the same curl definition. Porosity (how well your hair absorbs moisture) also affects curl formation—high-porosity hair might need more product to maintain curls, while low-porosity hair might resist styling products.
Step-by-Step Guide to Perfect Curls
Getting those perfect curls can really change up your look. Whether you're prepping for a special event or just want to switch things up, knowing how to curl your hair the right way is key. This guide will walk you through understanding different curl types, picking the right tools, and using techniques that fit your style.
Let's dive into the world of curls and find out how to make them work for you. Start with clean, dry hair that's been protected with a heat protectant spray. Section your hair into quadrants (top, sides, and back) for better control. Begin curling from the bottom layers and work your way up, as this creates a more natural-looking progression of curls.
For each section, clamp the flat iron about 2-3 inches from the roots (to avoid the scalp), then rotate the iron 180 degrees away from your face. Slowly glide the iron down the hair shaft while maintaining that rotated position. The slower you move, the tighter the curl will be. For looser waves, move more quickly and rotate less dramatically.
Troubleshooting Common Curling Challenges
Even with the best techniques, you might encounter some challenges. If your curls fall flat quickly, you might be using too low heat or not allowing the curls to cool completely before touching them. Try pinning each curl to your head with a bobby pin as you create it, then letting them cool for 10-15 minutes before releasing.
If you're getting crimped or uneven curls, check your flat iron's plate alignment. Misaligned plates can create hot spots that damage hair and produce inconsistent results. Also, ensure you're using consistent tension throughout the curling process—varying pressure will create uneven curls.
For those with naturally straight hair that resists curling, try curling your hair the night before and sleeping on it, or use a stronger hold styling product before curling. Some hair types simply need more "encouragement" to hold a curl shape.
Maintaining Your Curls Throughout the Day
Once you've achieved your perfect curls, maintaining them requires some strategy. Start with the right products—a light-hold hairspray applied before curling can provide invisible support, while a texturizing spray after curling adds volume and definition.
Avoid touching your hair excessively throughout the day, as the oils from your hands can weigh down curls. If you need to refresh curls later, use a light mist of water or curl refresher spray, then gently reshape with your fingers or give them a quick pass with the flat iron.
For overnight maintenance, consider the "pineapple" method—gathering your hair loosely at the crown of your head and securing it with a scrunchie. This preserves curl shape while you sleep. In the morning, simply shake out your hair and refresh as needed.
Conclusion: Mastering the Art of Flat Iron Curling
Mastering how to curl hair with a straightener opens up a world of styling possibilities. From tight, defined curls to loose, beachy waves, the techniques you've learned here provide the foundation for countless looks. Remember that practice makes perfect—don't be discouraged if your first attempts aren't exactly what you envisioned.
The key takeaways are to choose the right tool for your hair type, use proper heat protection, work in manageable sections, and be patient with the learning process. With time and practice, you'll develop the muscle memory and confidence to create salon-worthy curls at home, saving both time and money while expressing your personal style through versatile, beautiful curls.
- Bombshell Report Hakeem Jeffries Solicited Funds From Jeffrey Epsteins Sex Trafficking Empire
- What This Golden Retriever Chose For His Birthday Will Shock You
PPT - How To Get Perfect Curls Every Time PowerPoint Presentation, free
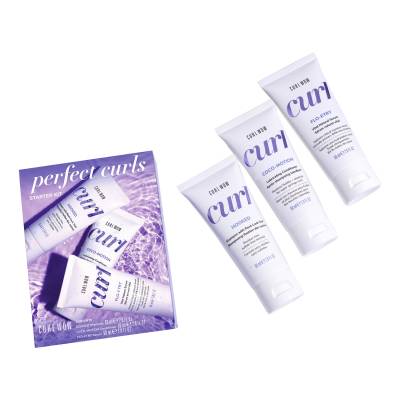
COLOR WOW Curl Wow Perfect Curls Starter Set Curl Wow Perfect Curls
Heartwarming Info About Can Hair Regain Curls Black Little Girl

